Surya Namaskar: All 12 Steps, Breath Cues and Safer Options
Master the 12-position Surya Namaskar sequence using exact breath cues, practical modifications, and safer options for every stage.
https://primetempr.com/blog/surya-namaskar-all-12-steps-breath-cues-and-safer-options
Surya Namaskar is easiest to learn when you stop treating it as one long blur. This guide breaks one traditional version into 12 positions, gives each movement a breath cue, and shows where you can reduce load without losing the shape of the sequence.
The sequence below follows the 12-position version described by the Morarji Desai National Institute of Yoga, Ministry of Ayush. It is not the only valid Sun Salutation. A Vinyasa class may teach Surya Namaskar A or B with plank and Chaturanga; another Hatha lineage may pause longer, use a different leg first, or coordinate the breath differently. Learn the version in front of you before trying to make every class agree.
This is general education, not individual medical advice. Generated pose illustrations are visual cues, not alignment assessments. If you are new, pregnant, older, returning after surgery, or managing pain or a health condition, practise with a qualified teacher and ask a health professional what should be modified for you.
Before you begin: set up the sequence you are actually practising
Use a stable, nonslip mat with enough room to step one leg back. Keep two yoga blocks near the top of the mat if the floor feels far away. A folded blanket under the back knee can make the lunges more comfortable.
In this guide, positions 1 to 4 begin with the right leg stepping back. Position 9 brings that right foot forward. To make a balanced full round, repeat all 12 positions with the left leg stepping back in position 4 and coming forward in position 9. Some teachers call each 12-position pass a round; others call the right-and-left pair one round. Count sides, not labels, and you will not lose track.
The breath pattern is a coordination tool, not a test. Take a normal extra breath when you need one. Do not force a breath hold, rush a transition, or make yourself dizzy just to remain on count.
| Position | Shape | Common breath cue |
|---|---|---|
| 1 | Pranamasana | Exhale or breathe naturally |
| 2 | Hastottanasana | Inhale |
| 3 | Padahastasana | Exhale |
| 4 | Ashwa Sanchalanasana | Inhale |
| 5 | Parvatasana | Exhale |
| 6 | Ashtanga Namaskarasana | Exhale as you lower |
| 7 | Bhujangasana | Inhale |
| 8 | Parvatasana | Exhale |
| 9 | Ashwa Sanchalanasana | Inhale |
| 10 | Padahastasana | Exhale |
| 11 | Hastottanasana | Inhale |
| 12 | Pranamasana | Exhale or return to natural breathing |
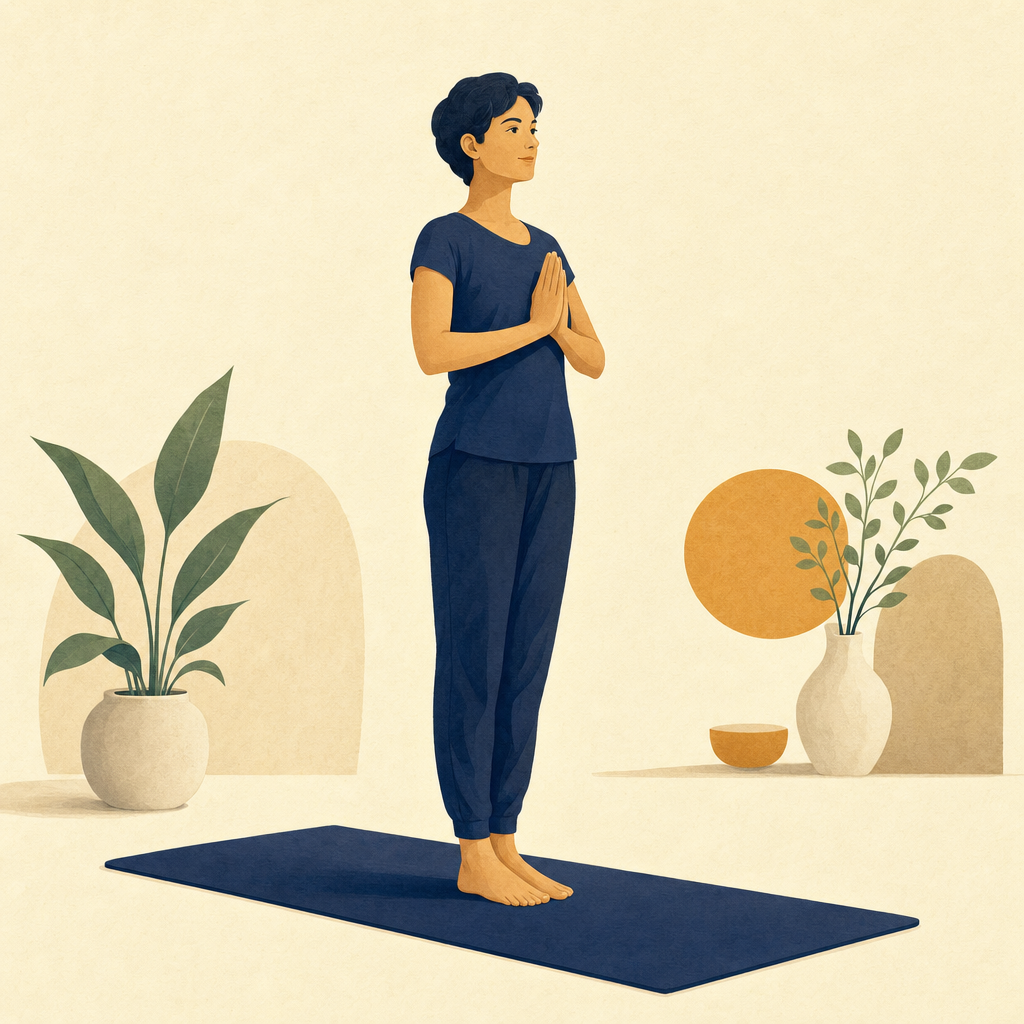
Position 1: Pranamasana (Prayer Pose)
Stand with your feet together or comfortably apart. Spread your weight across both feet instead of leaning into the heels or gripping with the toes. Let your arms rest, soften your gaze, and notice whether you are swaying.
Exhale and bring your palms together in front of your chest. Keep the shoulders easy and the back of the neck long. This is the start line: use it to check your breathing before adding movement.
Make it steadier by keeping the feet hip-width apart or standing near a wall. Palms do not have to press firmly; fingertips can meet lightly.
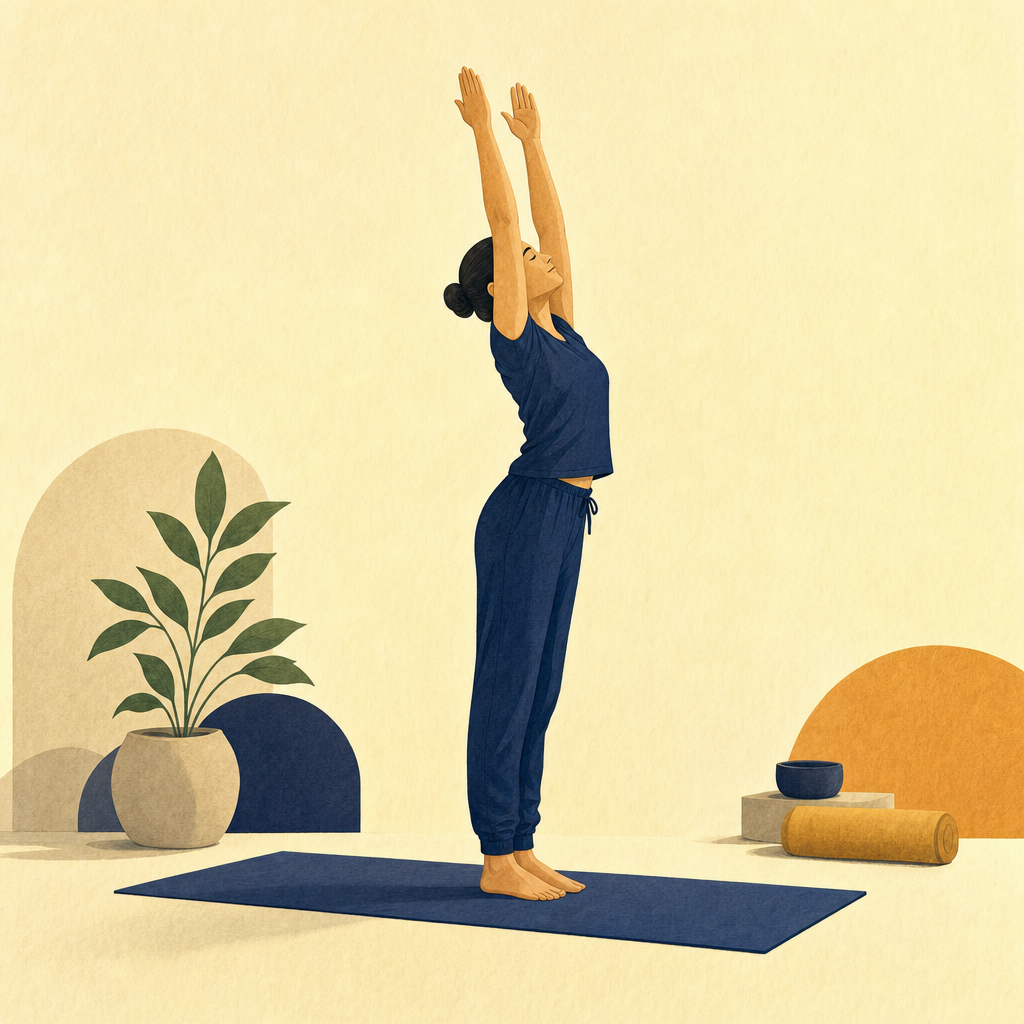
Position 2: Hastottanasana (Raised Arms Pose)
Inhale and sweep both arms overhead, about shoulder-width apart. Lengthen upward through your sides. Add only a small upper-back arc if it feels spacious; the movement does not need to become a deep backbend.
Keep the legs active without locking the knees. Think “lift, then arc,” rather than throwing the head and ribs backward.
Make it kinder to shoulders or back by keeping hands shoulder-width, bending the elbows, raising the arms only as high as comfortable, or skipping the backbend to stay upright.
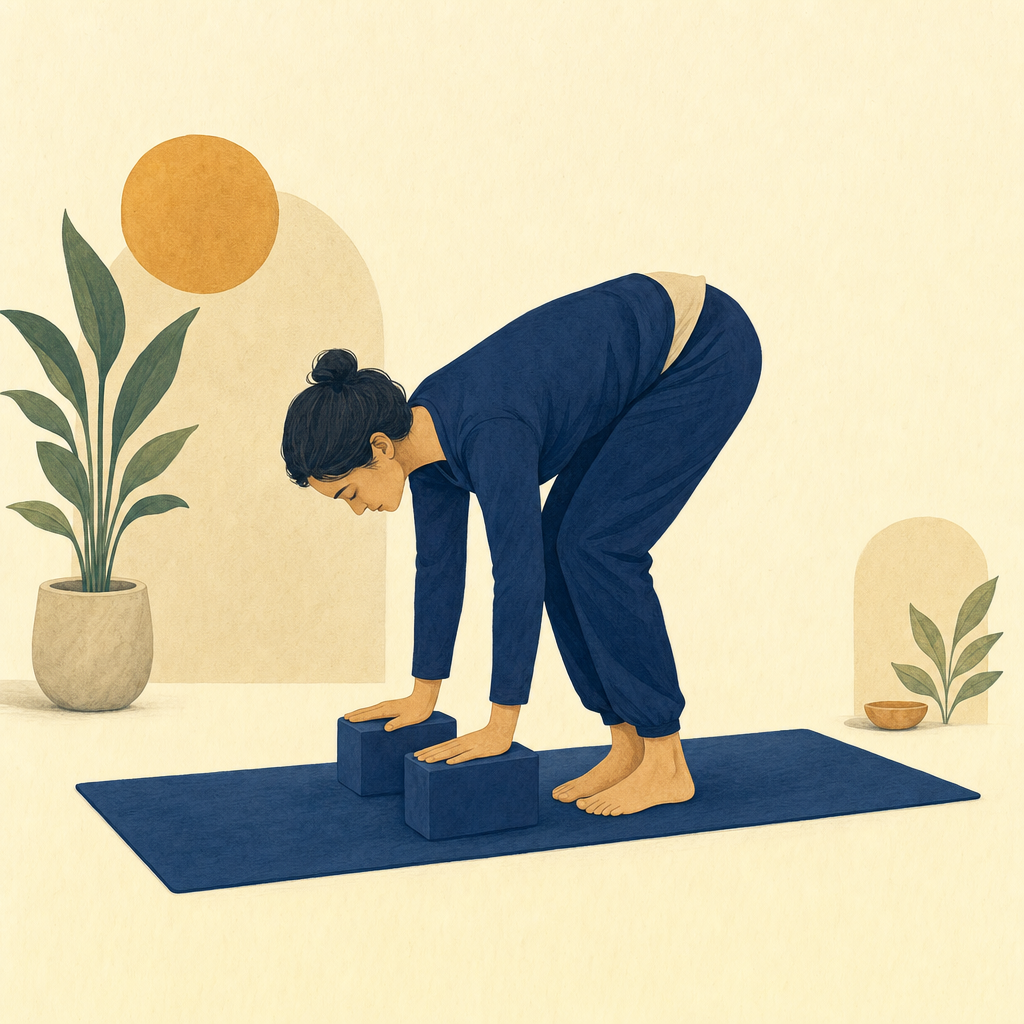
Position 3: Padahastasana (Hand-to-Foot Pose)
Exhale and fold forward from the hips. Let the knees bend enough for the abdomen and thighs to meet. Place fingertips or palms beside the feet only if they reach without pulling; blocks are a complete version of the pose, not a consolation prize.
Relax the head and keep the breath moving. The source sequence describes straighter knees and a deeper fold, but neither is a requirement for learning the pattern.
Make it more accessible by bending the knees generously and placing hands on blocks, shins, or thighs. If folding makes you light-headed, come up slowly and pause upright.
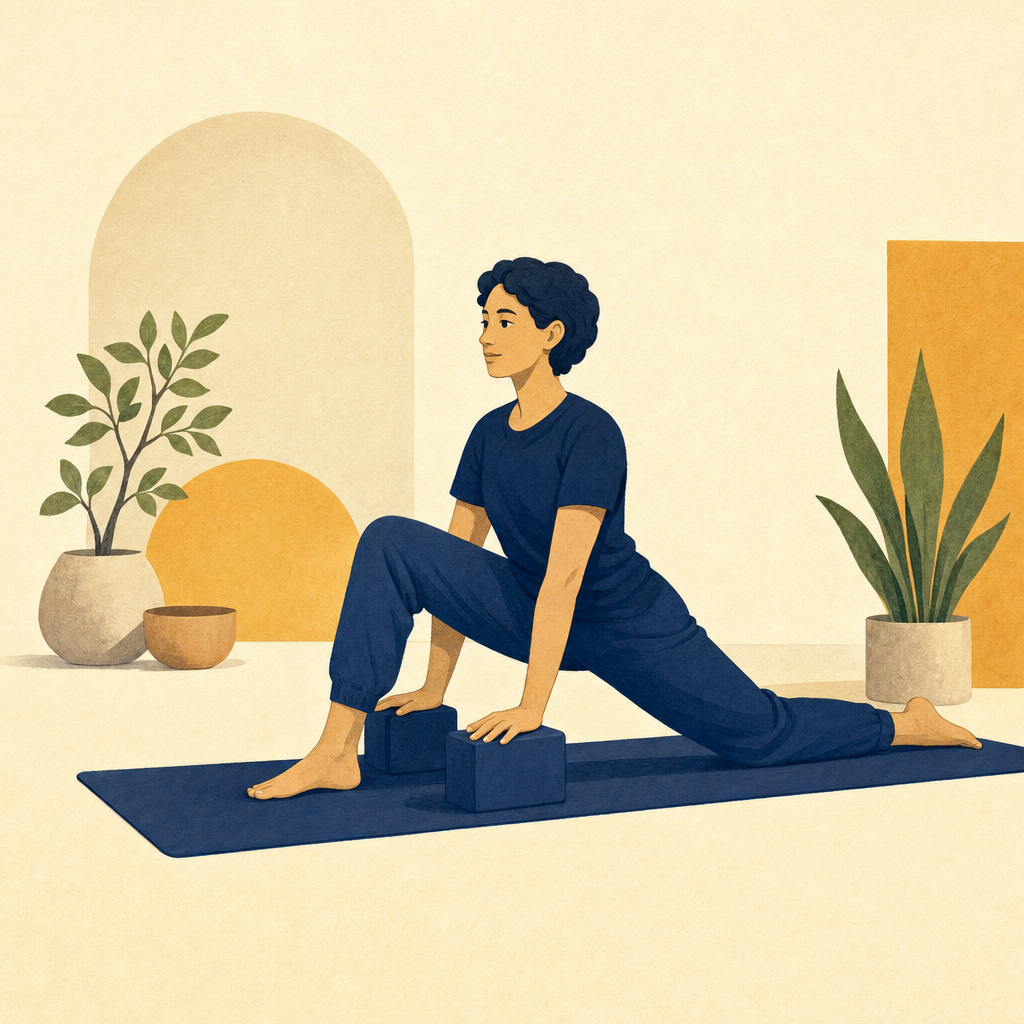
Position 4: Ashwa Sanchalanasana (Equestrian Pose)
Inhale, keep your hands down, and step the right leg back. Lower the right knee to the mat. Stack the front knee in a comfortable range over the left foot and lengthen the chest forward without compressing the neck.
If the foot does not travel between the hands in one step, place it where it lands and help it forward with your hand. That is a transition skill, not a flexibility failure.
Reduce knee or wrist load by padding the back knee, keeping hands on blocks, or bringing hands to the front thigh once you feel balanced. Keep your gaze forward or down rather than forcing it upward.
Position 5: Parvatasana (Mountain Pose)
Exhale, plant the palms, and step the left foot back beside the right. Lift the hips up and back so the body forms an inverted V. This position is often called Downward-Facing Dog in modern classes.
Press through the hands, lengthen the spine, and let the knees bend. Heels may move toward the floor, but they do not need to touch it. Prioritise space through the back over straight-looking legs.
Reduce wrist or hamstring demand by bending the knees, shortening the stance, or placing hands on a secure wall or sturdy chair for an elevated version.
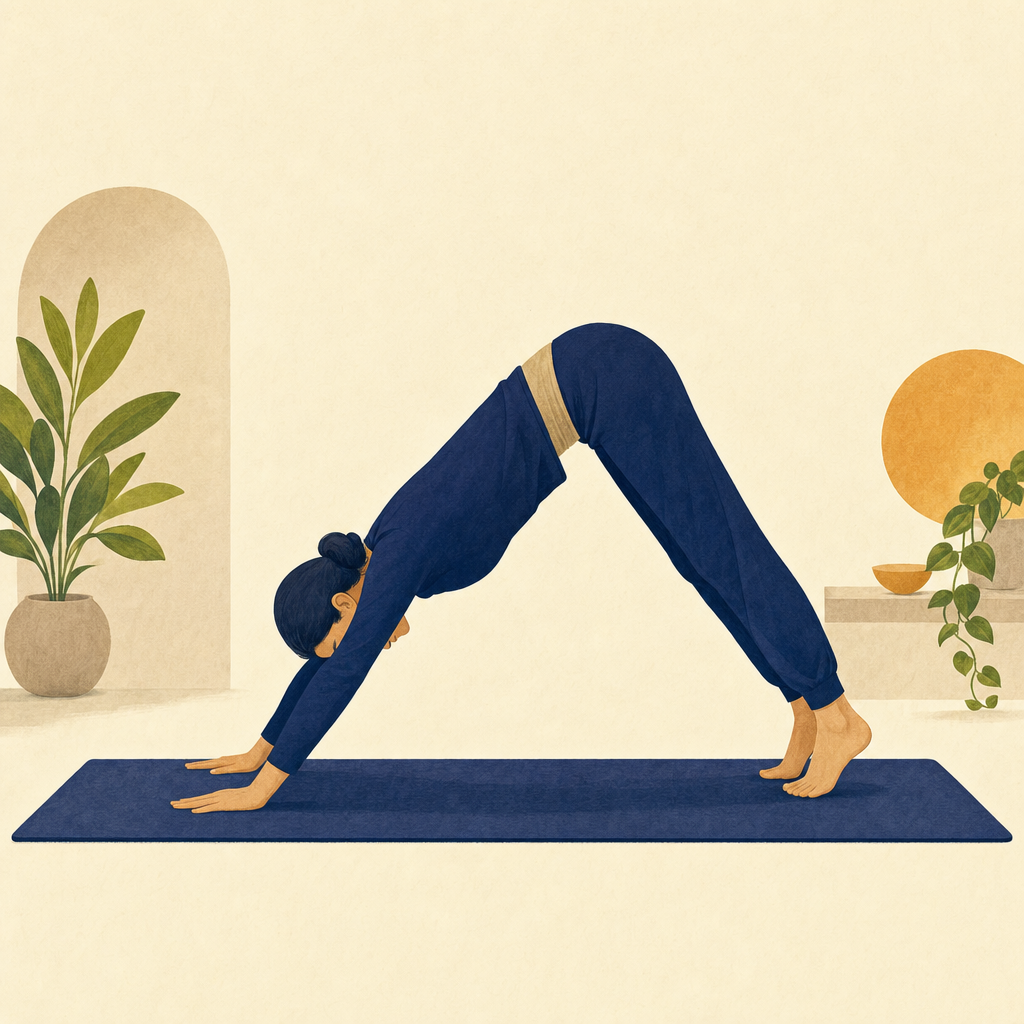
Position 6: Ashtanga Namaskarasana (Eight-Point Salute)
From Mountain Pose, bring the knees down. Exhale as you lower the chest between the hands and bring the chin or forehead toward the mat while the hips remain slightly raised. The traditional “eight points” are the two feet, two knees, two hands, chest, and chin.
This transition can be awkward when learned from text. Move in stages and do not collapse into the shoulders.
Choose a simpler lowering from hands and knees, lower the torso only as far as you can control, or come all the way to the abdomen with the forehead down. If chin-to-floor compresses the neck, use the forehead. A teacher can help you choose a version that fits your shoulders and spine.
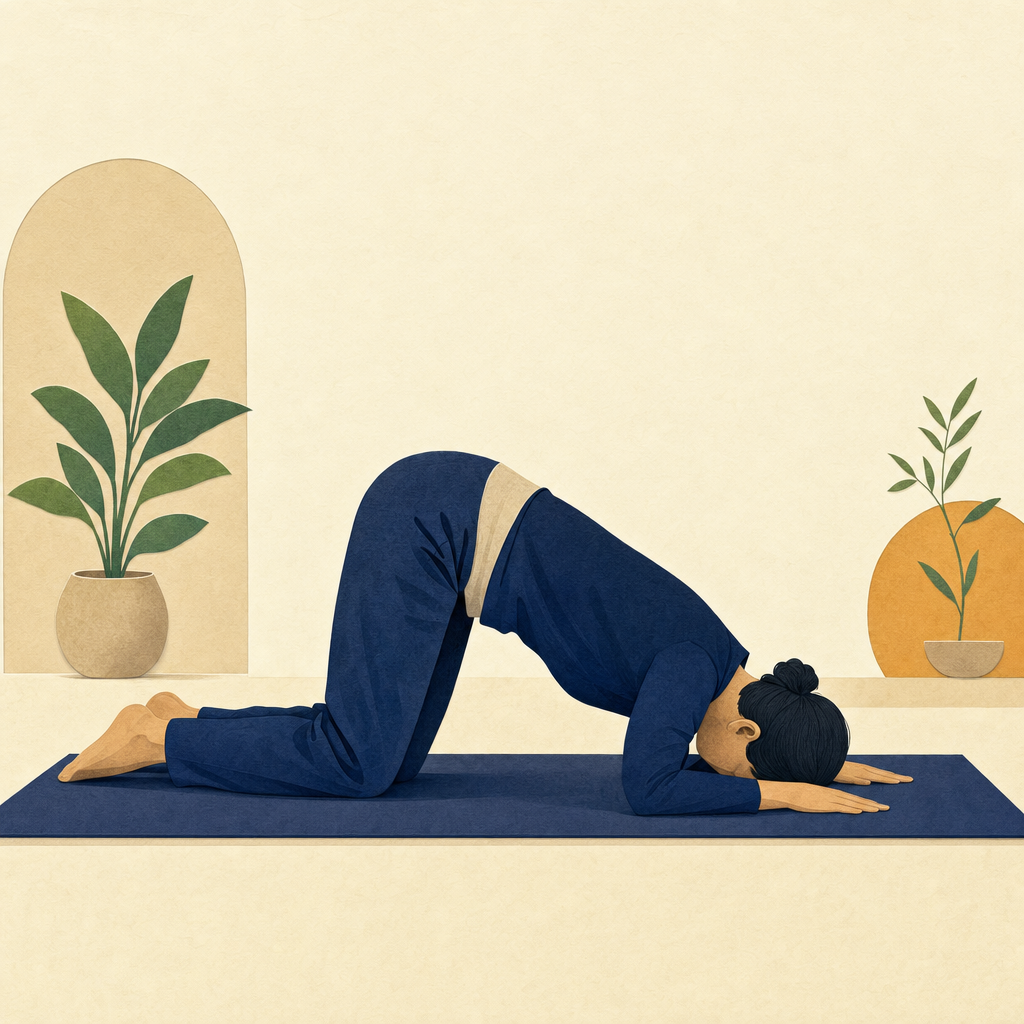
Position 7: Bhujangasana (Cobra Pose)
Inhale, lower the pelvis and slide the chest forward into Cobra. Keep the legs long behind you. Press the tops of the feet down, draw the shoulders away from the ears, and lift the breastbone using the back body as well as the hands.
The elbows can stay bent. Height is not the goal; an even curve and a comfortable neck matter more than straight arms.
Use Baby Cobra to keep very little weight in the hands and lift the chest only a few centimetres. If backbending is not appropriate for you, remain prone or move to hands and knees instead.
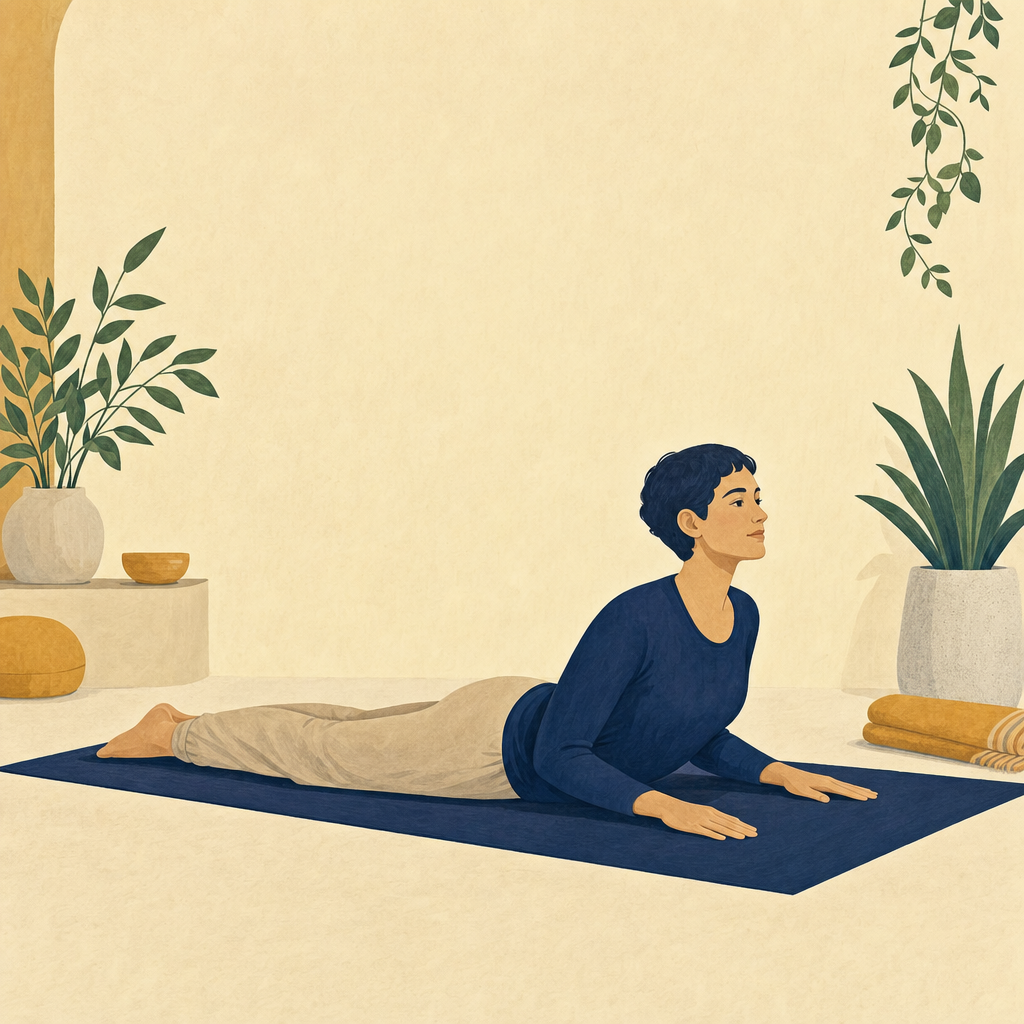
Position 8: Parvatasana (Mountain Pose)
Exhale, tuck the toes, press through the hands, and send the hips back to Mountain Pose. Re-establish the long diagonal from wrists to hips before thinking about the legs.
This repeated position is a useful reset. Take another breath here if you need time before stepping forward.
If the transition is too loaded, move through hands and knees, then lift the hips. You can also remain in a tabletop position for one breath.
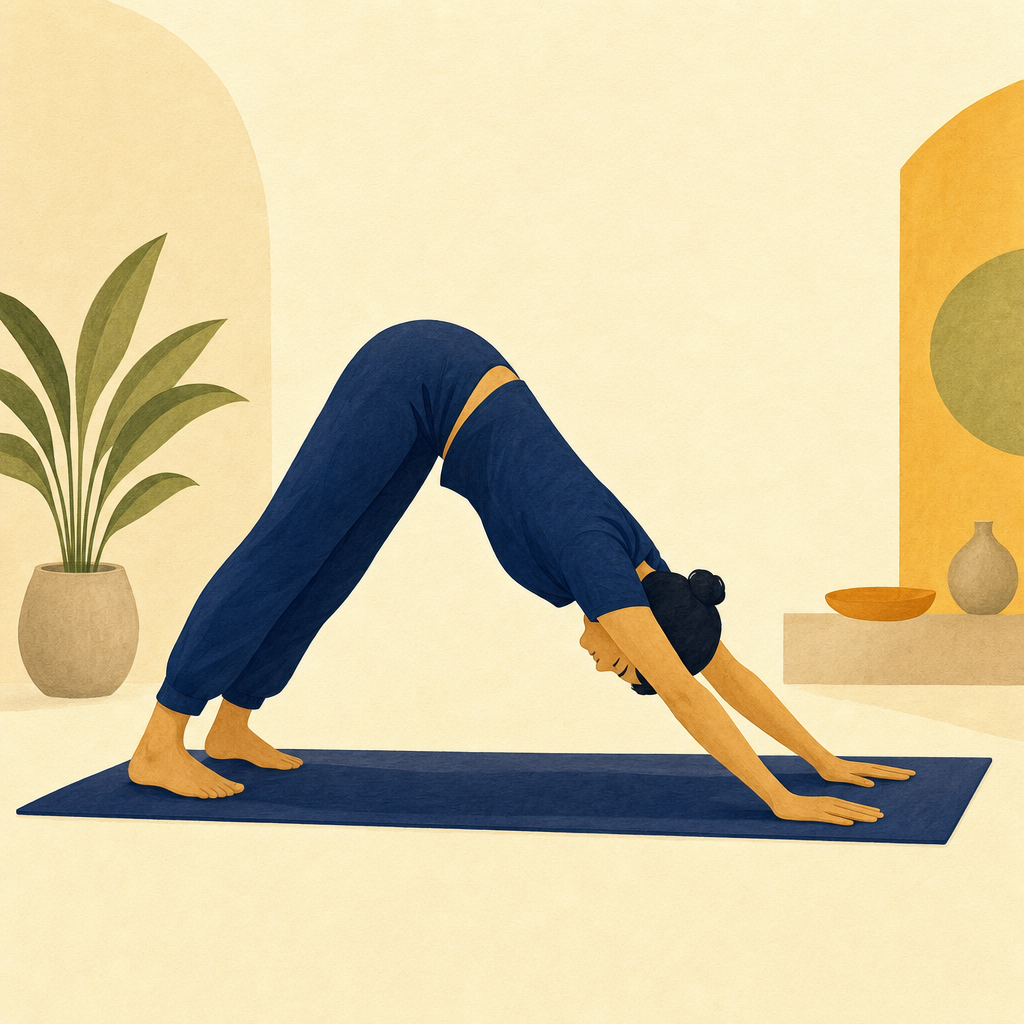
Position 9: Ashwa Sanchalanasana (Equestrian Pose)
Inhale and bring the right foot forward between the hands while the left knee lowers. This mirrors position 4 with the legs reversed.
Do not worry if the foot arrives in several small steps. Keep enough width between the feet to balance and avoid forcing the front knee or ankle into an exact angle.
Create space by using blocks under the hands, helping the foot forward with one hand, or coming briefly to hands and knees before placing the foot.
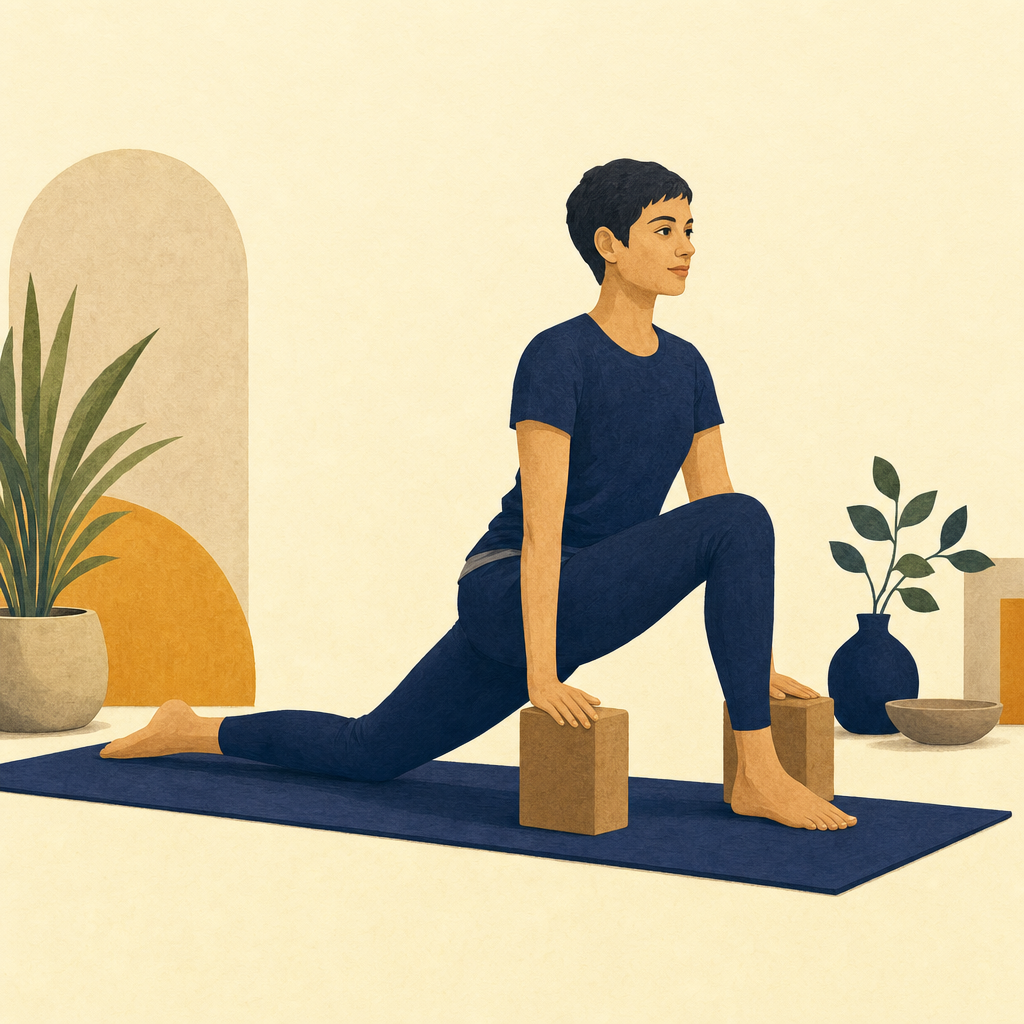
Position 10: Padahastasana (Hand-to-Foot Pose)
Exhale and step the left foot forward to meet the right. Fold from the hips with knees bent as needed. Let the head hang without pulling it toward the knees.
Notice whether the second fold feels different from the first. The sequence does not require both sides or both folds to look identical.
For balance or dizziness, keep fingertips on blocks, place hands on thighs, and rise in stages rather than in one quick movement.
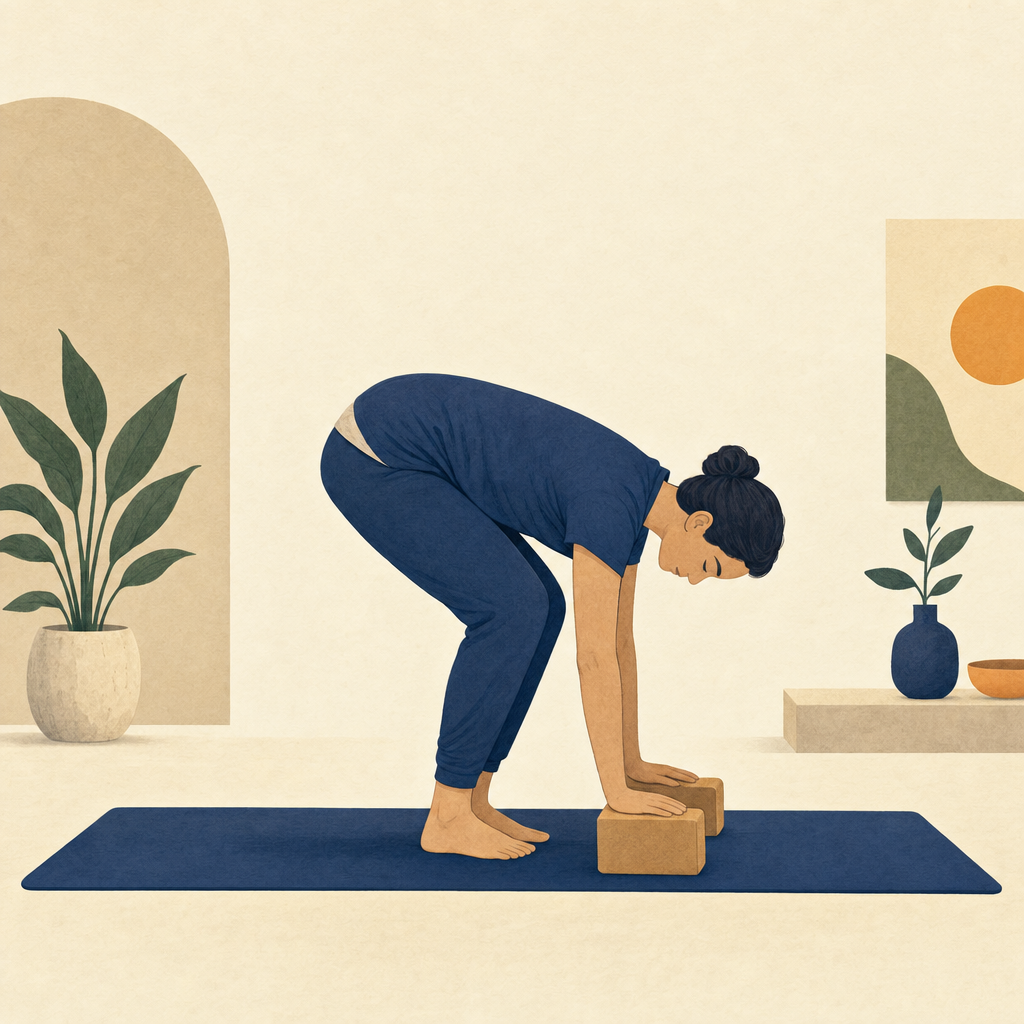
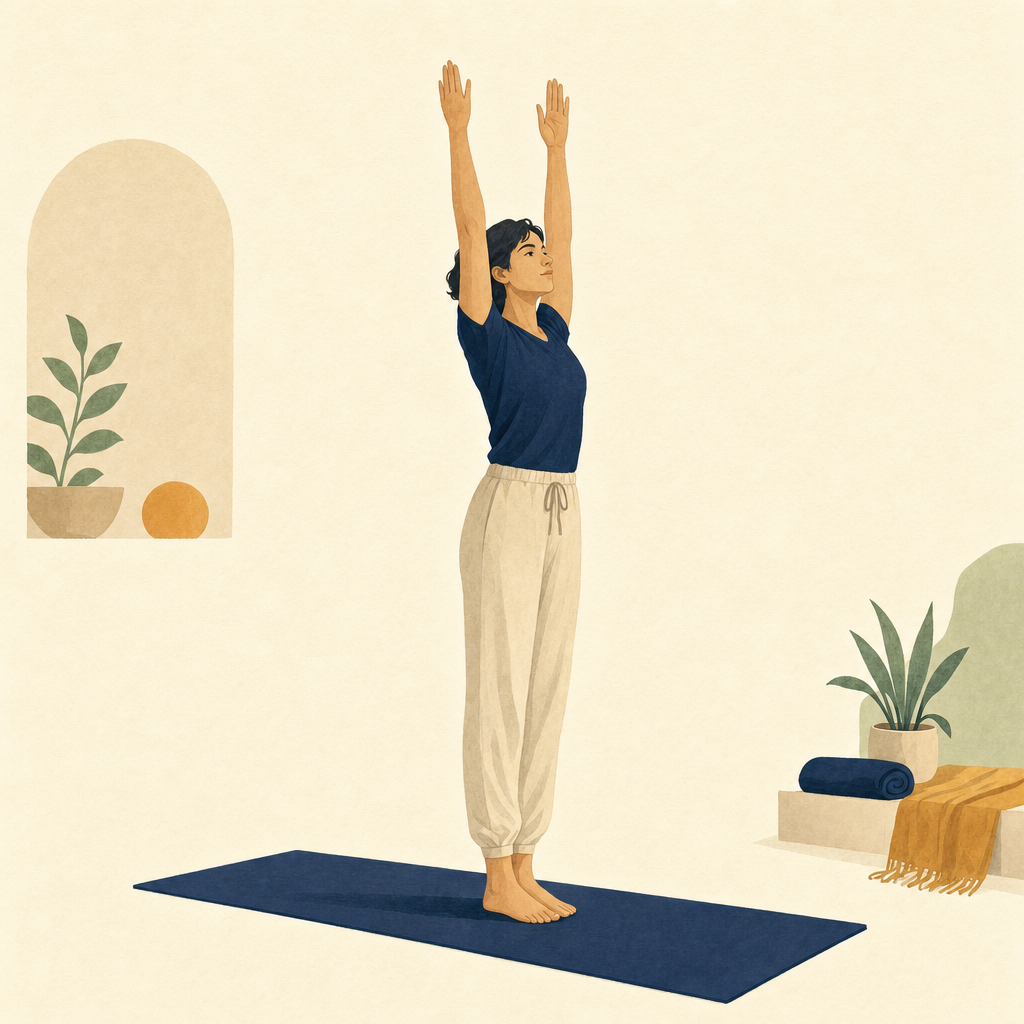
Position 11: Hastottanasana (Raised Arms Pose)
Inhale, press through the feet, lengthen the spine, and rise with the arms reaching overhead. Once upright, add the same optional small upper-back arc used in position 2.
Avoid leading with the chin or pushing the hips far forward. A smooth return to standing is more useful than a dramatic backbend.
Use less range by bringing hands to the hips while rising, then lifting the arms only if the shoulders and balance feel settled.
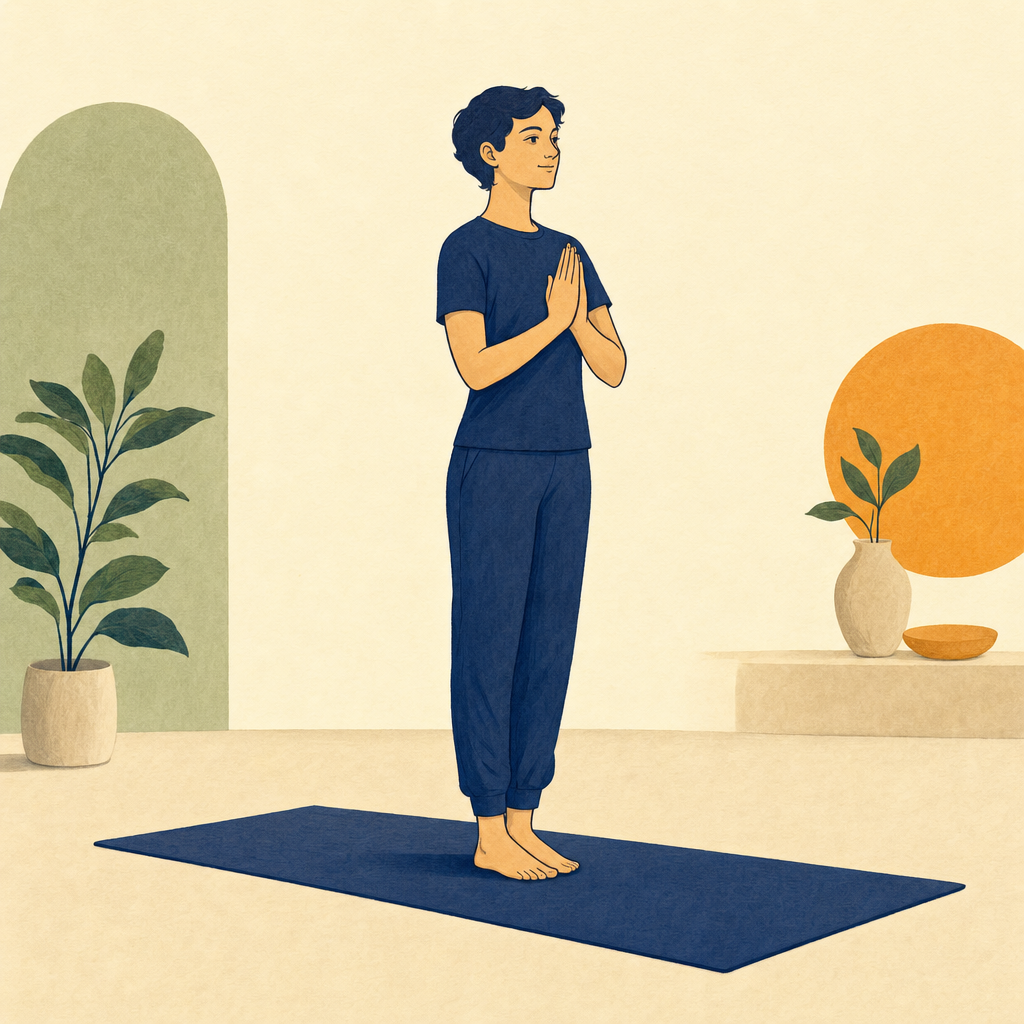
Position 12: Pranamasana (Prayer Pose)
Exhale and return the palms to the chest. Let the breath return to its own rhythm. Feel both feet and notice whether your breathing is calm enough to repeat.
One 12-position pass is complete. For the second side, repeat the sequence with the left leg stepping back in position 4 and coming forward in position 9.
Pause instead of pushing on by lowering the arms, widening the feet, or resting if the breath feels strained. Completion is not an instruction to continue.
Common problems and practical fixes
The breath is always one step behind. Slow the movement down and take one extra neutral breath between positions. First remember the route; coordination becomes easier after the route is familiar.
Stepping forward feels impossible. Use blocks to create clearance, take several steps, or move through hands and knees. Avoid throwing the foot forward with momentum.
Wrists become uncomfortable. Spread the fingers, reduce how long you bear weight, use an elevated surface, and rest. Persistent or sharp pain is a reason to stop and get individual guidance.
The lower back pinches in the raised-arms or Cobra positions. Make both backbends much smaller, keep the abdomen gently active, and focus on length rather than height. Skip the backbend if discomfort remains.
You feel rushed because other people are moving faster. Practise the 12 positions separately. A slower, controlled pass is still Surya Namaskar.
A first practice plan
Try this only if the sequence is appropriate for you:
- Rehearse positions 1 to 4 and return to standing.
- Rehearse positions 5 to 8 separately, using hands and knees between shapes if useful.
- Walk through one right-leading 12-position pass without trying to match every breath.
- Rest and notice your breathing, wrists, knees, shoulders, and back.
- If you remain comfortable, complete one left-leading pass.
- Finish standing or rest in a comfortable position for several breaths.
There is no universally correct daily number. Begin with one balanced right-and-left pair, or less, and add repetitions only when technique and breathing remain steady. Speed changes the character and demand of the practice; more rounds are not automatically better rounds.
Watch alongside this guide
Traditional Sun Salutation — guided practice
Optional seven-minute follow-along context after the reader learns the sequence; click-to-load and not used as evidence.
The YouTube player stays unloaded until you choose to watch. Loading it connects to YouTube and may allow that service to process usage data.
When to stop, modify, or ask for help
Yoga is generally considered safe for healthy people when practised appropriately, but strains and sprains can occur. Stop the sequence for sharp, electrical, escalating, or unfamiliar pain; dizziness or faintness; chest pain; or breathlessness that does not settle with rest. Seek urgent medical help for severe or emergency symptoms.
The U.S. National Center for Complementary and Integrative Health advises pregnant people, older adults, and people with health conditions to discuss their needs with a health professional and yoga instructor. Existing knee or hip injuries, lumbar spine disease, severe high blood pressure, balance issues, and glaucoma are among the situations that may require changes. Recent surgery, acute injury, or instructions from your clinician also take priority over a generic sequence.
Do not use Surya Namaskar to diagnose or treat a medical problem, and do not delay appropriate care because a yoga sequence has been described as therapeutic elsewhere.
Frequently asked questions
Is Surya Namaskar the same as Sun Salutation A?
Not always. “Surya Namaskar” is a broad name for sun-salutation practices. This guide uses a 12-position Hatha sequence with Mountain Pose, Eight-Point Salute, and Cobra. Many Vinyasa classes use a different Surya Namaskar A with plank, Chaturanga, Upward-Facing Dog, and Downward-Facing Dog.
Which leg goes back first?
This guide sends the right leg back first, then repeats with the left. Another school or teacher may begin on the left. Follow one complete method consistently enough to balance both sides.
Must my heels touch the floor in Mountain Pose?
No. Bend the knees and prioritise a long, comfortable spine. Heel contact depends on stance, proportions, and available range; it is not proof that the pose is correct.
Should I practise at sunrise or on an empty stomach?
The Ayush source describes sunrise as traditional and recommends an empty stomach. Treat timing as a tradition and comfort consideration, not a requirement to ignore your health needs. Follow individual advice for food, medication, blood sugar, pregnancy, or other conditions.
Can I learn from the illustrations alone?
No. They are generated editorial cues and require yoga-safety review before publication. They cannot see your balance, pain, breathing, joint history, or movement quality. Use them to remember sequence order, and use a qualified teacher for individual feedback.
Sources
Watch alongside this guide
A beginner Yin yoga practice
This slower practice gives you a concrete style example to compare with the goals and class formats in the guide. Source: Yoga with Kassandra. This optional video is context, not evidence or personal instruction.
The YouTube player stays unloaded until you choose to watch. Loading it connects to YouTube and may allow that service to process usage data.